Here we are ...the second and final phase of this build -VASA's rigging.
In this segment the standing rigging, along with the tackle systems will be covered. For this, it is important to zone in on what's written concerning this process and/or area of build...I must have said this a thousand times over the years for builders (novice and professional) to not rush their projects for acceptance, but to evaluate (and re-evaluate) their research to make sure ALL the i's are dotted and all the t's are crossed. Especially in the rigging phase.
I have read several contemporary blogs regarding both plastic and wooden kits relative to the impossibility of rigging miniature models with the same amount of detail as their larger counterparts. That incorporating miniature detail to these smaller models (both in hull and rigging) would distort the scale -and that the quality would be compromised to those kits that were readily prefabricated. Not true, because the beautiful word 'modification' bring into existence, by way of research, the probability of achieving the best in any kit.
The first criteria to good rigging is good planning...
Here, I just finished a partial rigging table for VASA.
Rigging tables can be beneficial for both present and future use, especially when possible clients request a second or third build from the original. Every artist/builder has their own style and/or method that makes a work a 'signature'. A work of art that is easily identifiable by a discerning buyer and/or collector...Finally, since builders have their own interpretations, it is best that such information be safeguarded.
For years I have researched and re-worked rigging tables based on the studies of others and have discovered more details that have enriched my line of work.
After finishing rigging tables, sails are bent to how I want them featured. For this particular model I want to make the sails appear wind-blown. This will take a lot of engineering to make paper appear cloth-like. Also, to have the lines appear realistic in their fall/belay locations. Here, in the backdrop of the sails, I show a rough pre-sketch used to support the actual configuration(s).
Notice that all blocks and lines are added to both sail and yard(s). This procedure make it easier for the rigging process to move smoothly. One sail can take a day to produce and rig... Sometimes two to three days as shown in the photo images below which depict the main course sail.
Main Course Sail...front view.
Main Course Sail...rear view
Blocks and tackles...tackles and blocks -one of the areas of build I found to be most challenging (to the testing of patience)...In the image below, the miniature blocks and tackles illustrate how awesome a model can become. To make this happen I utilize my personal tools dubbed the "rigging chopsticks". These were made to perform a jeweler's style art to the rigging as shown in the two photos below:
Applying the blocks and silk lines using "rigging chopsticks".
In the above images, progressive results can be seen with the use of these sticks...and the detail becomes 'front and center' for quality. This instrument is not only capable for securing rigging lines (in perfection), but can also assist with the gentle curvature of lines in areas where it seem impossible to reach.
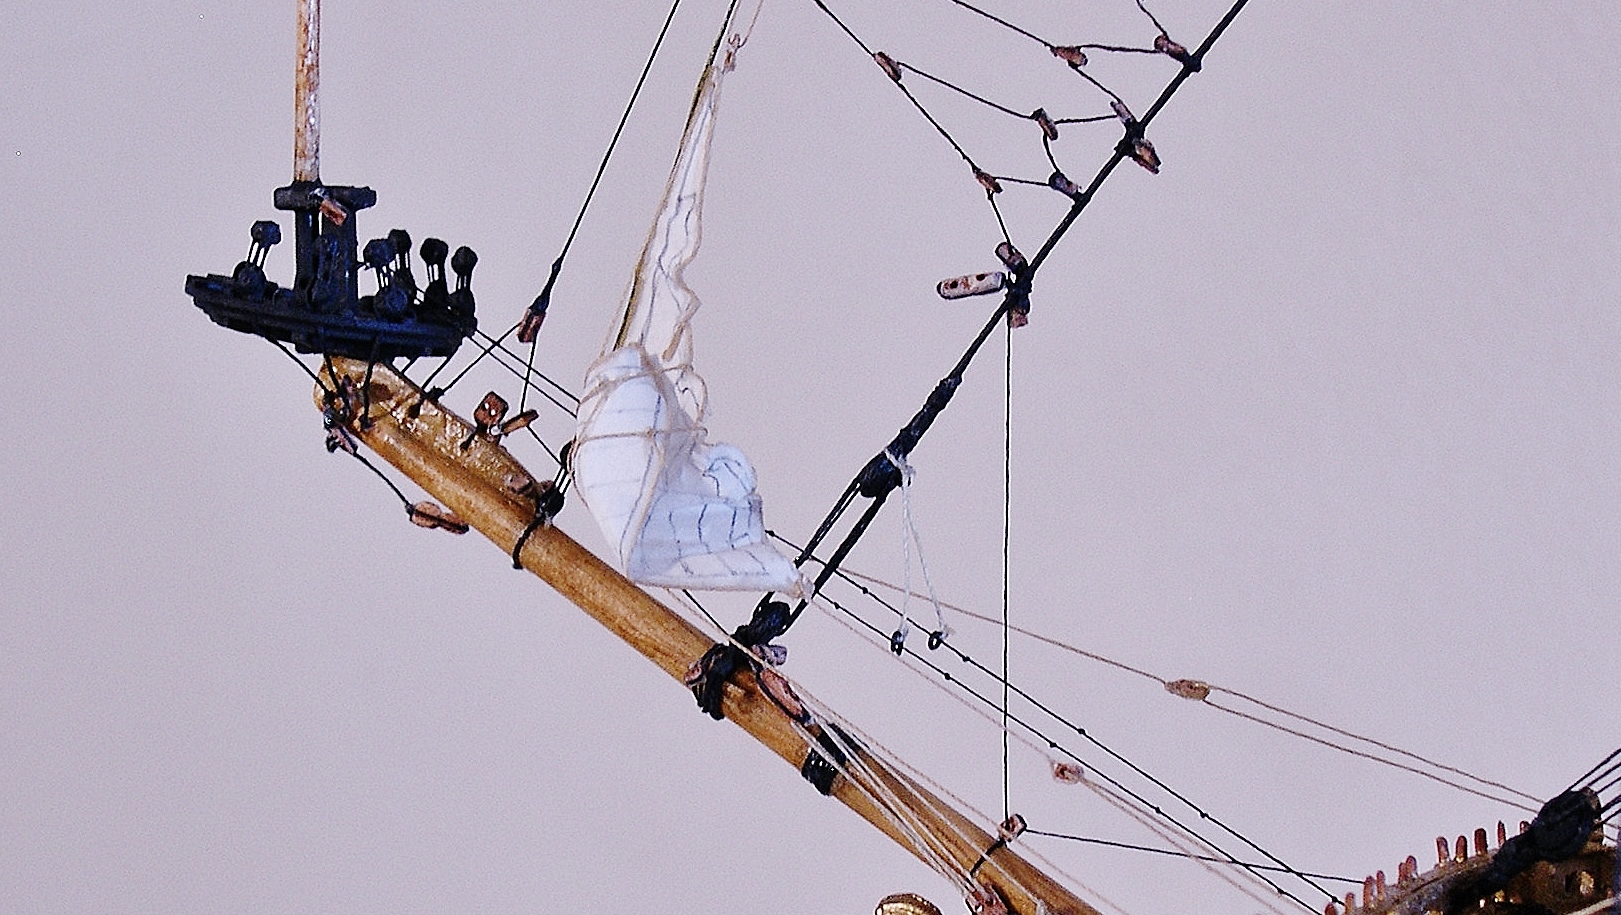
Billowing effects show the gentle curves on the spritsail edges and sheet lines. Also in the lower photo image, details are shown in a deck closeup of belayed lines and coiling-a result from using the "chopsticks".
Here, another angle showing sheet and tack lines hanging loosely to simulate realism.
Starboard bow showing the attached bowlines on the forecourse -along with the tacks and sheets. Once these lines are established, it is here where patience run its course... Again, the "chopsticks" come into play because none of the lines can be attached with tweezers without fouling existing lines. The long metal point of the sticks are thin enough to get lines through the small areas and be effective enough to secure them to their respective pins. Tweezers only serve to assist those lines.
With the sprit(s) and forecourse sails established (as shown), I now work my way to the flags.
In my most humble opinion, flags can make or break the appearance of a good model. Depending on how a model is presented, it is best to have the flags in unison with the sails. If sails are full and limp, then flags should follow the same pattern. If sails are in a slight or full breeze, then flags should be the same...And finally, when wind push sails back against mast(s), flags should be angled sideways (port or starboard) and/or flying backward. Wind pushing sails forward the mast, sails should be forward or angled sideways in forward position. Former servicemen brought this to my attention when I built commissioned kits during my youth.
This image show the paper flags provided by the Airfix manufacturer. These are not properly scaled for the model; so to correct this, I cut a smaller version and changed the paper thickness -applying the references from Bjorn Landstrom's book concerning his graphics and colorscheme.
Here, the new flags and pennant are fashioned as windswept pieces. By placing these flags on the masts (prior to finishing the remaining sails), gives a visual blueprint on how those sails will be bent based on the formation of the flags.
With the foremast sail and rigging systems in place, I now move on to the mainmast -using photo references to get the proper folds and bends of my sails before applying. This can be a long drawn out process since the sails are paper that can be easily torn or punctured. However, with years of practice, I've been able to achieve realistic settings concerning them.
In my prime as a builder, I studied Asian artists and adopted some of their techniques in my work to get a step higher with miniature projects -especially in the genre of sailing ships. I realized that silk had properties that would later fit into my rigging concepts -and that chopsticks and sandpaper would serve to bring about the very detail I was expecting in ship modeling.
Viewing the images below, the point is proven as I address VASA's mainmast.
In the four above images the main course and topsails are installed...shaped to display a billowing effect in those sails. The last image show the lines secured to the knights and pinrails on deck. These are also secured in the tops to fulfill the assignment of a complete rig.
At best, the latter half of the rigging process is the most difficult because the lines are much tighter together. This is one of the reasons the rigging chopsticks is an invaluable and exceptional tool. I can get immense detailing with it...So now I continue with 'the finish' of the main mast and move on to the mizzen -beginning with the lateen sail shown in the image below.
This now finalize the last phase of the rigging.
The next blog will feature limited photos on the completed model based on the late Bjorn Landstrom's book "The Royal Warship VASA". The build has been interesting, to date, because the book brought in depth study of how the ship was built. That, coupled with my research on her rigging made this a unique project of note. So now I close being satisfied that I can encourage other builders (whether hobbyist or professional) to study their kits and make the best of them.
I an not in the business to 'compete'...Never have, never will. My purpose in the maritime is to give insight into the world of shipmodels and take place it on a subtle plateau of visibility so that others can be encouraged to take it to another level of excellence by their choosing.
As for those who have kits that wish to be finished for enjoyment and/or display, I can oblige this. Kindly email me at Caseships@yahoo.com or visit my Linkedin page and supporting youtube page at
https://www.linkedin.com/in/rexstewart/ and
https://youtube.com/c/RexStewartoriginals . I can also be reached at 1-774-757-7137 for details.
I now leave you, the viewer, with these thoughts and look forward to your next visit on this subject of the Swedish frigate VASA. Fair winds!